Related Parts
View More
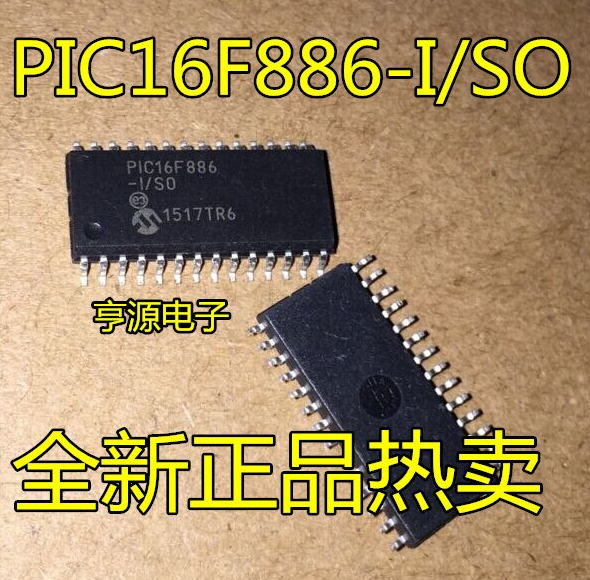
How To Program The PIC16F886-I/SO Using The Arduino IDE
Do you have an Arduino unit lying around? If you do, then you are in luck! In this blog post, we are going to show you how to program the microcontroller PIC16F886-I/SO using the Arduino IDE. This software is available for free and makes it easy to write code that controls your Arduino unit. By following along with this tutorial, you will be able to control your Arduino with just a few simple commands. So whether you are a beginner or an experienced Arduino user, this tutorial is for you. Let’s get started!
What is PIC16F886-I/SO Arduino?
The PIC16F886-I/SO is an Arduino-compatible development board that implements the Atmel SAM3X8E 8-bit microcontroller. It features a 2MB flash memory, 10KB SRAM, and a 2.5V to 5.5V power supply. The PIC16F886-I/SO can be programmed using the Arduino IDE.
What are the different types of PIC16F886-I/SO Arduino Boards?
There are a few different types of Arduino boards available for the PIC 16F886-I/SO microcontroller. These boards range in price and features, so it is important to choose the right one for your needs.
The most common Arduino board type for the PIC 16F886-I/SO is the Uno R3. This board is affordable, easy to use, and supports many of the same programming languages as the more expensive boards. It also includes a number of built-in sensors and buttons, making it perfect for beginners.
If you need more control over your programming projects, consider purchasing an Arduino Pro or Pro Mini board. These boards are more expensive, but they offer greater flexibility and power than the Uno R3. They also include extra ports, so you can connect additional hardware devices to your project.
If you plan on using your PIC 16F886-I/SO with a computer system, you should purchase an Arduino Mega board. This board offers increased processing power and storage space than any other Arduino model, making it perfect for long-term projects. It also includes a number of advanced features not found on other Arduino boards, such as USB support and programmable I/O pins.
How to Download and Install the PIC16F886-I/SO Arduino IDE
If you’re new to Arduino, or just want to learn more about the PIC16F886-I/SO microcontroller, the Arduino IDE is a great place to start. The IDE makes programming the PICF-I/SO easy and fun.
To download and install the Arduino IDE, follow these steps:
1. Go to https://www.arduino.cc/.
2. Click on the “Downloads” link in the main navigation bar.
3. In the “Arduino IDE” window that opens, click on the “Sites” tab at the top of the window, and then click on the “Downloads for Boards” link under that tab.
4. In the “Arduino IDE” window that opens, click on the “ Boards ” tab at the top of that window and then click on the “PIC16F886-I/SO” entry in that list. (Alternatively, you can search for it using Ctrl+F .) If you don’t see this board listed yet, please wait a few minutes while we update our database of compatible boards with new versions of Arduino software releases.
5. Click on either of the download links for the PIC16F886-I/SO Arduino IDE files: either a .zip file or a.
Setting Up Your Board
If you have never programmed a microcontroller before, or if you are new to Arduino, we suggest reading our Getting Started with Arduino board guide first. In this tutorial, we will show how to set up your PICF-I/SO using the Arduino IDE.
To begin, open the Arduino IDE and install the required libraries by clicking on “Manage Libraries…” in the menu bar and selecting “Add Library…” In the window that pops up, search for “PIC16F877A” and click on the link to add it to your library. If you have not already done so, connect your PICF-I/SO to your computer using the USB cable. Open the sketch we created earlier in this tutorial and change its name to “PICF_Iso.”
Next, click on the ” upload” button in the toolbar and wait for Arduino to upload the code onto your PICF-I/SO. Once it has finished uploading, open a command prompt (cmd) terminal on your computer and type in control / ? This will display all of the available commands that you can use with your PICF-I/SO. For example, if you want to read from an analog input pin on your board, you would type control / read 12.
Uploading a Program
If you have never used the Arduino IDE before, it is a software development environment designed for learning how to program microcontrollers such as the PICF-I/SO. The Arduino IDE can be downloaded for free from the Arduino website. Once installed, open it up and click on the “Preferences” button at the top toolbar. Next, in the “Arduino Source Code” text box, type in the following code:
#include // This line includes an library that will allow us to communicate with our microcontroller
int main(void) { // Setting up some basic information Wire.begin(); Wire.setWriteEncode(false); Wire.setReadEncode(true); // We’re going to create a serial port so we can send and receive data Serial port = 0; while (!SerialPortAvailable()) { ; } SerialPortAvailable(); // Now we’re ready to start broadcasting bytes to our microcontroller digitalWrite(Serialport, HIGH); unsigned long buffer[5]; int i = 0; while (i < 5) { buffer[i++] = (byte) ((i & 0x0F) << 4); } digitalWrite(Serialport, LOW); int length = strlen((char*)buffer); printf(“%s
“, buffer); return 0; }
When you run this code, an output window should pop up showing gibberish because we’re not actually sending any bytes yet
Setting Up Your PIC16F886-I/SO Development Environment
Setting up your PIC development environment can be a daunting task if you are unfamiliar with the Arduino IDE. In this article, we will walk you through setting up the Arduino IDE and installing the PIC16F886-I/SO library. Next, we will demonstrate how to program the PIC using the Arduino IDE.
Testing Your Code
If you are new to programming with microcontrollers, or the Arduino IDE, there are a few things you should do before diving into testing your code. First, check out the Getting Started guide at Arduino. cc. This guide will walk you through downloading and installing the Arduino IDE, creating a new project, and setting up your computer for programming.
Once you have the Arduino IDE installed and configured, it’s time to get started learning how to program PICs using the Arduino IDE. To begin working with PICs in the Arduino IDE, open a new sketch file (in the Documents folder) called piscode_test.ino and enter the following code:
#include #include #include // constants const int LEDPin = 13; const int ButtonPin = 11; // variables int ledState; unsigned long startTime; // function void setup() { pinMode(LEDPin, OUTPUT); } void loop() { if (!buttonPressed()) { return; } digitalWrite(LEDPin, HIGH); delay(1000); digitalWrite(LEDPin, LOW); delay(1000); } void buttonPressed() { switch (buttonState) { case UP: ledState = LOW; break; case DOWN: ledState = HIGH; break; default: printf(“Incorrect button state!
“); return;} } }
The first few lines of the code include the required library files. In this example, we are using the PIC16F877A microcontroller and the Arduino IDE. The next few lines define some constants for our project. These constants will be used to store information about our LED and button states.
The setup function is called once when the sketch starts up. Here, we need to set up our digital pins as outputs. We also initialize our ledState variable to store current LED state.
The loop function is where we will do all of our programing. In this function, we first check to see if the button has been pressed. If it has not been pressed, then we turn on the LED using the pinMode function and wait 1000 milliseconds before turning it off again.
If the button has been pressed, then we use a switch statement to change the LED state based on the button state. To understand how this works, look at the code below:
case UP: ledState = LOW; break; case DOWN: ledState = HIGH; break; default: printf(“Incorrect button state!
“); return;}
When the button is clicked in either direction, estate will be set to either LOW or HIGH.
Conclusion
In this article, we will be showing you how to program the PIC16F886-I/SO using the Arduino IDE. We will also be discussing some of the important features of this microcontroller, and give you a few examples of projects that can be implemented using it. If you are interested in learning more about programming microcontrollers, then I suggest that you read through this article until everything is clear. Finally, we would love to hear your thoughts on our tutorials in the comments section below!