Related Parts
View More
How to Program the PIC16F688-I/SL With Arduino
One of the most popular microcontrollers on the market is Arduino. It’s a simple platform that can be used for a variety of projects, from home automation to robotics. In this tutorial, we will show you how to program the PIC16F688-I/SL using Arduino. This chip is perfect for projects like this because it has a wide range of capabilities and is relatively easy to use. Once you have mastered this tutorial, you will be able to create all sorts of fascinating projects with Arduino!
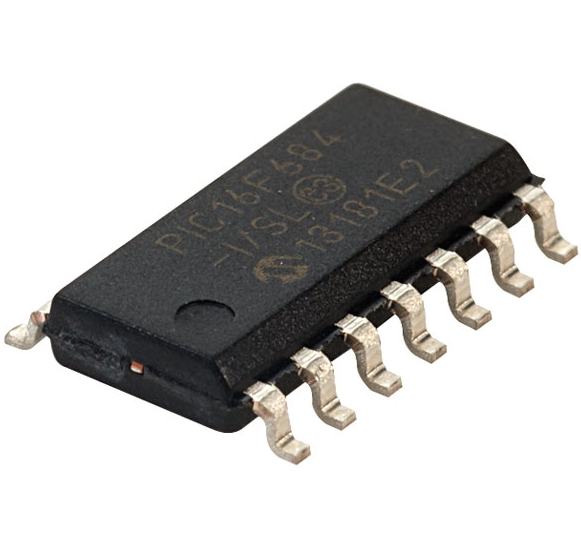
What is the PIC16F688-I/SL?
The PIC16F688-I/SL is a microcontroller that integrates a 12-bit A/D converter, 10-bit D/A converter, 4 KB internal memory, and an Ethernet interface. It is well suited for industrial control applications, such as automated building control and home automation.
To program the PICF-I/SL with Arduino, you will need the following items:
1) A computer with an Arduino IDE installed
2) The PICF-I/SL microcontroller (available from many online retailers)
3) An USB cable to connect the microcontroller to your computer
4) A programming board such as an Arduino UNO or Leonardo (available from many online retailers)
5) Some basic programming skills
Setting Up the Arduino Environment
1. Download and install the Arduino software:
Visit the Arduino website, and click on “Downloads.” Under “Software,” select the version of Arduino you want to use (Windows, Mac, or Linux). Then click on the “Download” button.
Once the download is complete, double-click on the Arduino-1.6.15.zip file to extract it. If you downloaded the Mac version of Arduino, you will need to unzip it before using it.
Open up the folder where you extracted Arduino-1.6.15 and click on the “Arduino” icon. This will open up a window that looks like Figure 1-1.
Figure 1-1: The default installation of Arduin
What Can Arduino Do With It?
Arduino is a popular board for programming microcontrollers. It can be used to program the PICF-I/SL using its built-in firmware editor. Arduino is a versatile board that can be used in many different ways.
How to Program the PIC16F688-I/SL With Arduino
In this tutorial, we will be programming the PIC16F688-I/SL with Arduino. The PIC16F688-I/SL is an 8-bit microcontroller from Microchip Technology Inc. It has a CPLD (Configurable Logic Device) on board, which allows for a lot of flexibility when programming it using Arduino.
There are multiple ways to program the PIC16F688-I/SL with Arduino, but we will be using the Max7000 libraries. To install these libraries, open up your Arduino IDE and click on “ Sketch -> Include Library -> Manage Libraries” In the “Libraries” window that pops up, locate and click on the “Max7000” library. After clicking on the “Max7000” library, make sure that the box next to it says “Enable” is checked. Once done, click on the OK button in the Libraries window.
Now that we have installed the Max7000 library, let’s start by importing its required functions into our project file. To do this, open up your project file (.Arduino) and locate the section where you want to include the Max7000 functions. For this example, we will be including them at the beginning of our code so head over to line 8 and paste in the following code:
Arduino Uno Board
The Arduino Uno Board is an affordable, versatile board that can be programmed using the Arduino programming environment. It has a variety of ports and connectors that allow it to be easily connected to other devices, making it a great choice for projects that need limited I/O capabilities or flexibility. The Arduino Uno also features an onboard microcontroller that makes it possible to perform simple tasks with code, such as controlling digital outputs and inputs.
Programming the PIC16F688-I/SL
The PIC16F688-I/SL is a microcontroller with 16 KB of program memory and 2 KB of data memory. It has an on-chip oscillator, general-purpose I/O, and timers that can be accessed through the standard Arduino libraries.
You can use the PIC16F688-I/SL to control devices like LEDs and motors using the built-in features of Arduino. In this tutorial, we will show you how to program the PICF-I/SL with Arduino.
Setting Up the PIC16F688-I/SL
If you are new to programming microcontrollers, the first step is to get a programmer. A programmer can be purchased from many sources or built yourself. Here we will discuss how to program the PIC16F688-I/SL using an Arduino board.
In order to program the PIC16F688-I/SL using an Arduino board, you need to connect the programmer to your computer and the Microcontroller’s pins as shown below:
The following diagram illustrates how to program the PIC16F688-I/SL with an Arduino Board:
The Arduino is connected to your computer via a USB cable. The red (+) lead of the 16 MHz crystal is connected to GND on the Arduino board, and the black (-) lead is connected to Vcc on the Arduino board. The blue (5V) lead is used as a power supply for both boards.
Now open up your favorite code editor and type in these lines of code:
After saving your file, make sure that your Arduino is powered on by connecting it to your computer via a USB cable. Now open up Serial Monitor (Tools->Serial Monitor) on your computer and click on “Open”. Your Interrupt Pin should now be set at 9 (it should be set at 7 if you are using an older version of this sketch). If everything goes according to plan, you should see something like this in Serial Monitor when you run.
Conclusion
In this article, we will be teaching you how to program the PIC16F688-I/SL with Arduino. We will be covering the basic steps of programming using the Arduino IDE and providing some example codes that you can use to get started. By following these simple instructions, you should be able to program your PIC16F688-I/SL with ease. So whether you are a beginner or an experienced engineer, we hope that this tutorial has helped you get up and running with your new device!