Related Parts
View More
The Most Popular ATMEGA32A-AU Microcontroller
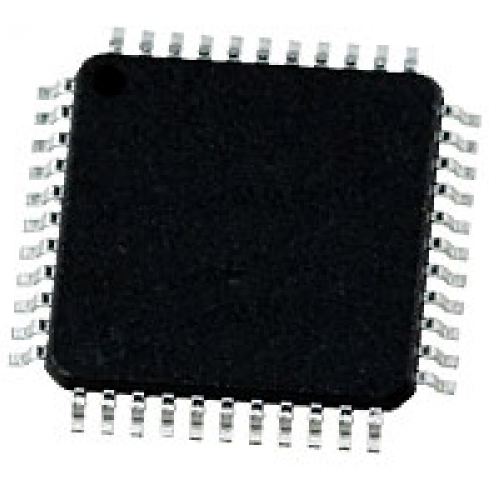
ATMEGA32A-AU microcontrollers make up the backbone of countless products, from home automation systems to wearable devices. They’re small, affordable, and easy to use, making them ideal for a variety of applications. In this blog post, we will take a look at the most popular ATMEGA32A-AU microcontroller and some of the best uses for it. From creating your own home automation system to learning how to develop embedded software, this microcontroller is perfect for just about anything you can imagine.
What is the ATMEGA32A-AU Microcontroller?
The ATMEGA32A-AU Microcontroller is a 32-bit microcontroller designed by Atmel. It has an onboard USB controller and can be programmed in AVR C or assembly language. The ATMEGA32A-AU is popular for use in low-power applications, such as small sensors and hobby electronics.
What are the features of the ATMEGA32A-AU Microcontroller?
The ATMEGA32A-AU Microcontroller is a microcontroller that is popular for use in Arduino boards. It has a variety of features, such as 16 KB of SRAM, 2 KB of EEPROM, and a 12-bit ADC. It also supports both USB and serial interfaces.
How can I use an ATMEGA32A-AU Microcontroller?
The ATMEGA32A-AU microcontroller is a powerful MCU that can be used in a wide variety of projects. Here are some tips on how to use this microcontroller:
1. First, check if your microcontroller supports the ATMega32A-AU processor. You can do this by checking its datasheet or online revision tables. If your microcontroller doesn’t support the ATMega32A-AU processor, you’ll need to find another one or purchase an adapter board.
2. Once you know your microcontroller supports the ATMega32A-AU processor, install the necessary firmware and libraries. The firmware is typically preloaded on the microcontroller, but you can also download it from official sources or flash it using a programmer like Arduino UNO or SAM3X8E USB Development Board with STK500V200 Flash programmer. In addition, you’ll need to install libraries for various programming languages such as C/C++, Assembly language, and Java. To find out more about these libraries and where to download them, consult the documentation accompanying your chosen programming language.
3. Next, design your project using the appropriate programming language and library. Start by creating a design file in your chosen language that will describe the circuit structure and components needed for your project. Then program the microcontroller using the same design file and see how it behaves on screen. If everything goes according to plan, you’re ready to start building!
Where can I find the ATMEGA32A-AU Microcontroller?
The ATMEGA32A-AU microcontroller is a popular choice for embedded systems and robotics projects. It offers many features and capabilities, making it a versatile option for a variety of applications. Here are some places you can find the ATMega32A-AU microcontroller:
NXP offers the ATMEGA32A-AU microcontroller as part of its M5 family of chips. This chip provides support for low-power operation and boasts several features that make it an excellent choice for embedded systems.
Microchip also offers the ATMega32A-AU microcontroller in its PICkit3 development platform. This platform provides access to advanced programming tools and built-in debuggers, making it ideal for developing embedded systems.
Another place to find the ATMega32A-AU microcontroller is on eBay. You can typically find this chip in bulk quantities, which makes it an affordable option for large projects.
Advantages of the ATMEGA32A-AU Microcontroller
The ATMEGA32A-AU microcontroller is a popular choice for Arduino projects due to its low cost and wide range of capabilities. Here are some advantages of using the ATMEGA32A-AU microcontroller in your projects:
-Low cost: The ATMEGA32A-AU microcontroller is a low-cost option compared to other Arduino microcontrollers.
-Wide range of capabilities: The ATMEGA32A-AU microcontroller has a wide range of capabilities, including support for WiFi, Bluetooth, and USB. This makes it ideal for use in projects that require access to multiple external devices.
-Portability: The ATMEGA32A-AU microcontroller is small enough to fit on a breadboard, making it easy to prototype projects on a small scale.
What Applications can be used with the ATMEGA32A-AU Microcontroller?
The ATMEGA32A-AU microcontroller is very popular because of its low price and wide range of applications. Below are some of the most popular applications that use the ATMEGA32A-AU microcontroller.
Robotics
The ATMEGA32A-AU microcontroller is commonly used in robotics because it is powerful and has a wide range of features. It can be used to control motors, sensors, and other components.
Digital Audio Players
Another common application for the ATMEGA32A-AU microcontroller is in digital audio players. These devices use MP3, WMA, or AAC music files and need to play them quickly and accurately. The ATMEGA32A-AU microcontroller is perfect for this application because it has a fast processor and can handle large amounts of data.
Remote Control Systems
One final application for the ATMEGA32A-AU microcontroller is in remote control systems. These systems allow people to control things from a distance using infrared signals. The ATMEGA32A-AU microcontroller is perfect for this application because it has a built-in IR receiver and transmitter.
How to Program the ATMEGA32A-AU Microcontroller
In this article, we will be discussing how to program the ATMEGA32A-AU microcontroller using the popular Arduino IDE. The ATMEGA32A-AU microcontroller is an excellent choice for basic programming needs and can be used in a variety of applications such as remote controls, hobby projects, and more.
First, you will need to download the Arduino IDE from https://www.arduino.cc/. Once installed, open it up and click on the ” Boards ” tab at the top. This will display a list of all available boards including the ATMEGA32A-AU. Click on this board to open its settings window. Next, click on the ” Serial Port ” button and select the com port that your computer is using (typically /dev/ttyAMA0 ). Finally, make sure that the ” Board: ATMEGA32A-AU ” setting is set to ” Use default device “. Now, you are ready to start programming!
To begin programming, open up your favorite text editor (such as Atom or Sublime Text) and paste in the following code:
#include // Required for some USB HID devices #include // Standard input and output functions int main(void) { HIDAPI hid = HIDAPI_Init(); if (!hid) { print(“Error initializing hid library\n”); return -1; } /* Get current device name */
How to choose the right ATMEGA32A-AU Microcontroller for your project?
When choosing the right ATMEGA32A-AU microcontroller for your project, consider its capabilities and price.
The ATMEGA32A-AU is a popular choice for projects that need the small size and low cost. It has ten digital I/O pins, four analog inputs, and two serial ports. The microcontroller can run at speeds of up to 8 MHz and has a built-in flash memory chip that stores programs and data.
The ATMEGA32A-AU also has a variety of features that can be useful for projects. For example, it supports watchdog timers, which can help protect your project against unexpected shutdowns. Additionally, it has an On-chip CRC generator that can help prevent data errors from occurring in your project.
What are some of the popular projects that use an ATMEGA32A-AU Microcontroller?
Some popular projects that use an ATMEGA32A-AU Microcontroller include the following:
1. Arduino boards: These are miniature computers that can be controlled using a programming language called Arduino. They are used for a variety of projects, including controlling lights and motors, monitoring temperature readings, and reading sensors.
2. Sensors: Many devices, from security cameras to garage door openers, use sensors to detect changes in their surroundings. An ATMEGA32A-AU Microcontroller can be used to control these sensors, making it easy to create complex systems.
3. Wearables: Many wearable devices require Bluetooth communication to function properly. An ATMEGA32A-AU Microcontroller can be used to create these connections and control the functionality of the device.
Conclusion
In this article, we have looked at the most popular ATMEGA32A-AU microcontroller. This microcontroller is very popular due to its low price and wide range of applications. It is a great choice for beginner programmers and can be used in many different types of projects.